Video games surged from arcade sensations like Space Invaders into living rooms via early consoles, culminating in Nintendo’s Famicom and its rebranded NES, which defined many hallmark genres and series. While official development once demanded costly, specialized hardware, modern PCs and emulators now make NES game creation accessible to hobbyists. The appeal lies in the system’s elegant constraints: small teams can craft complete experiences, and this guide aims to remove the biggest hurdle—getting started—by offering a clear, step-by-step path from idea to a working game.
The practical goal is to build a simple, fun space shoot‑’em‑up inspired by Astrosmash, using the same core techniques original NES developers used. Along the way, you learn the structure of a game and 6502 assembly basics; how to create background tiles and sprites; read controller input; implement collision detection; track score; and add sound effects and music. These skills generalize to platformers, adventures, and scrolling games, and the project also serves broader motivations: understanding fundamentals obscured by modern engines, delivering a polish achievable by a single developer, practicing work within tight resource limits, and building a compelling portfolio piece.
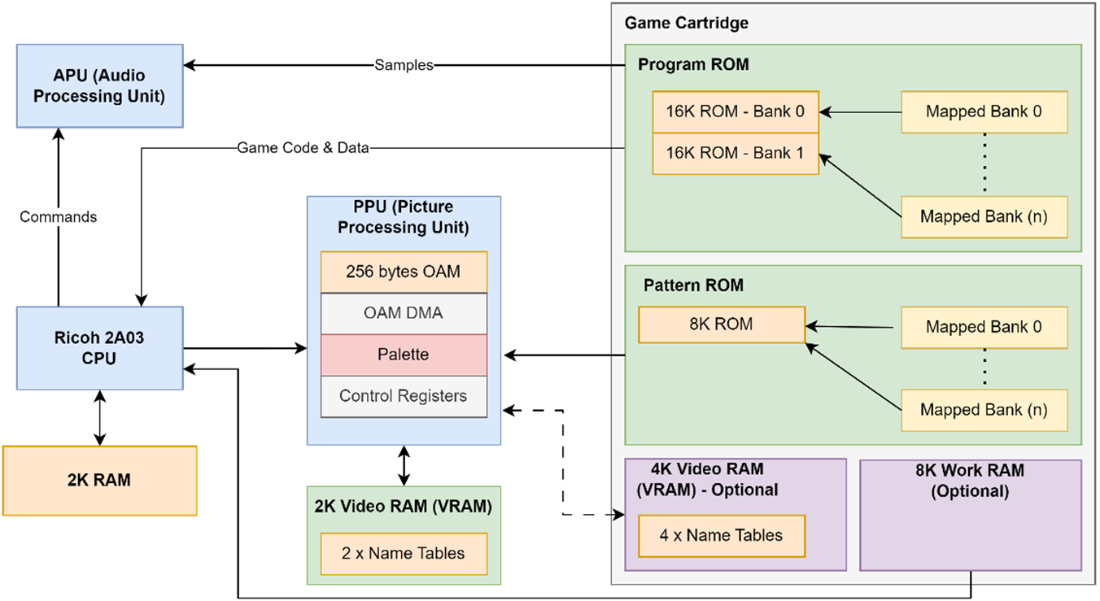
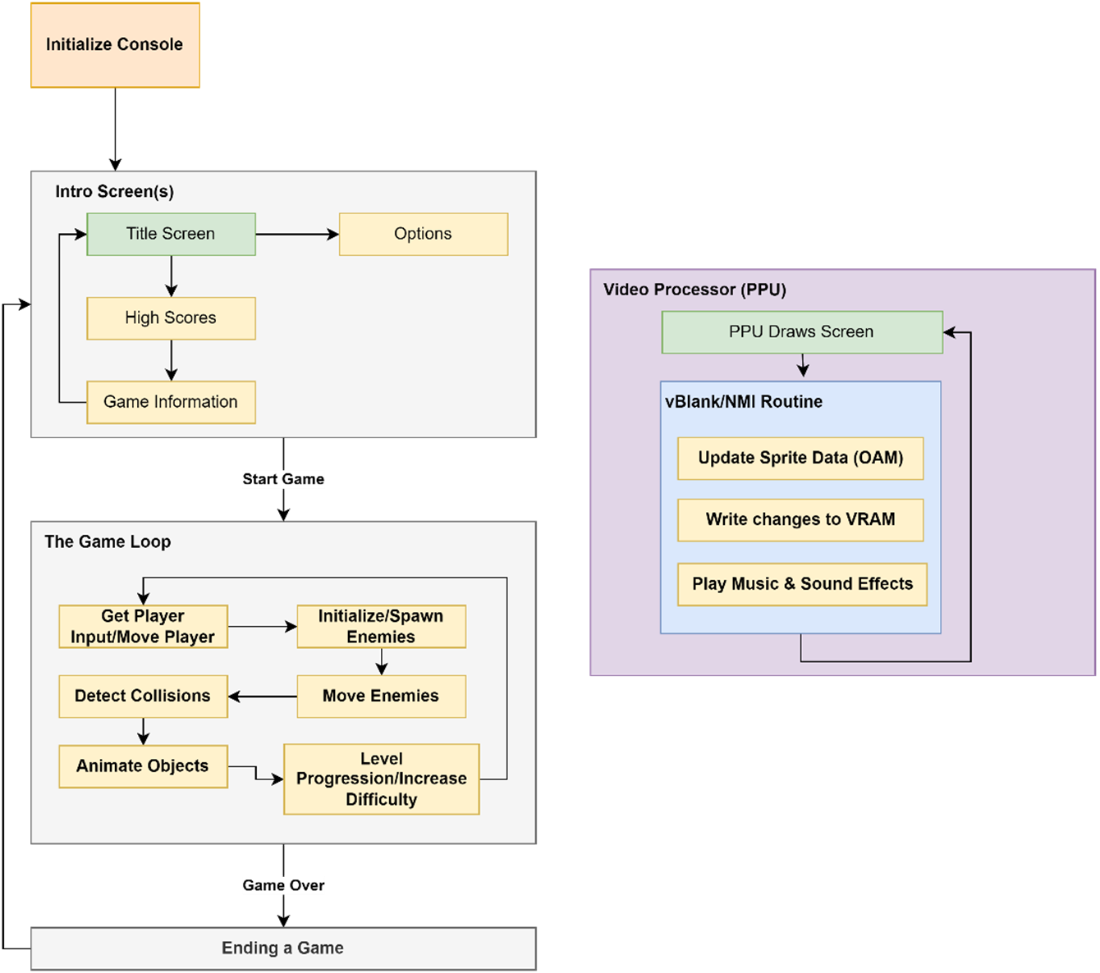
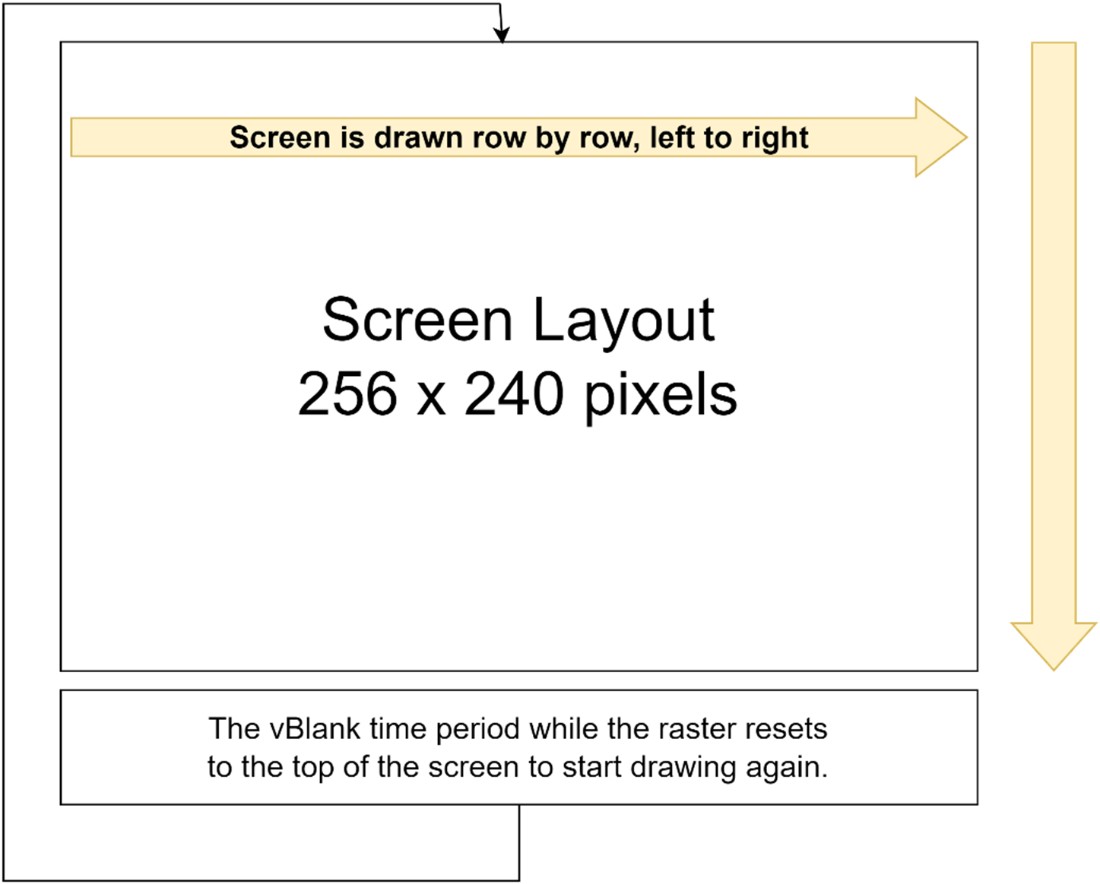
The chapter also frames the NES architecture and how it shapes game structure. The Ricoh 2A03 CPU (6502‑based) works with a PPU for graphics and an APU for audio, while cartridges can augment memory and pattern storage. Graphics are built from 8×8 tiles and sprites whose patterns are loaded into VRAM, and updates occur safely during vBlank, when the PPU triggers an NMI. A typical flow is: initialize the console (wait for readiness, clear RAM, set up audio, detect controllers, load patterns), present intro/title or options screens with a simple input loop, then run the main game loop—read input and move the player, spawn and move enemies, detect collisions, animate objects, and raise difficulty or advance levels—committing screen changes during vBlank and concluding with a deliberate ending or score summary for player closure.
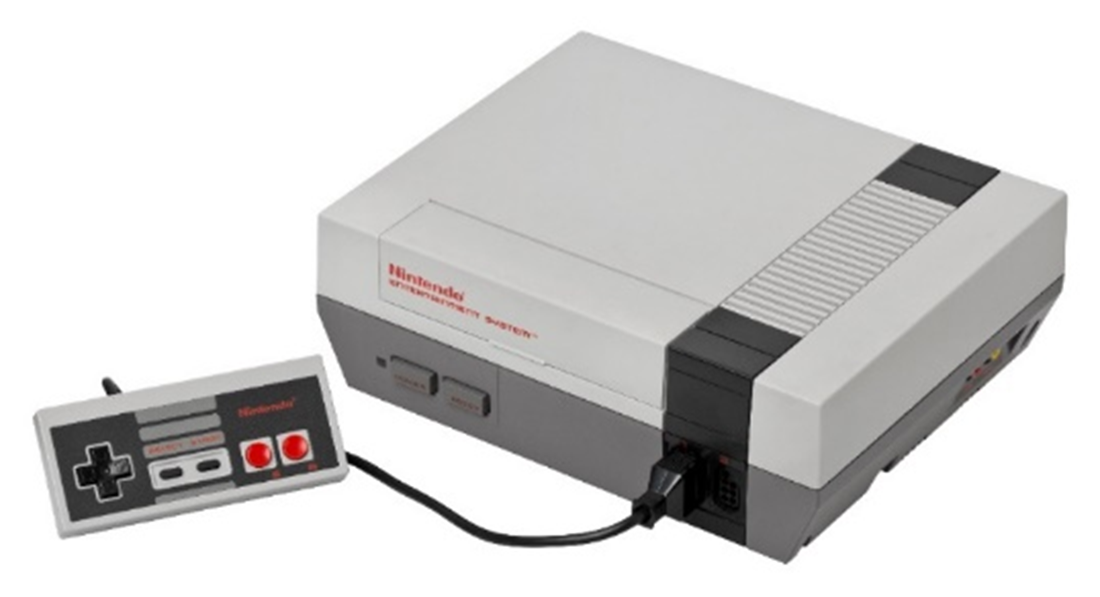
Nintendo Entertainment System
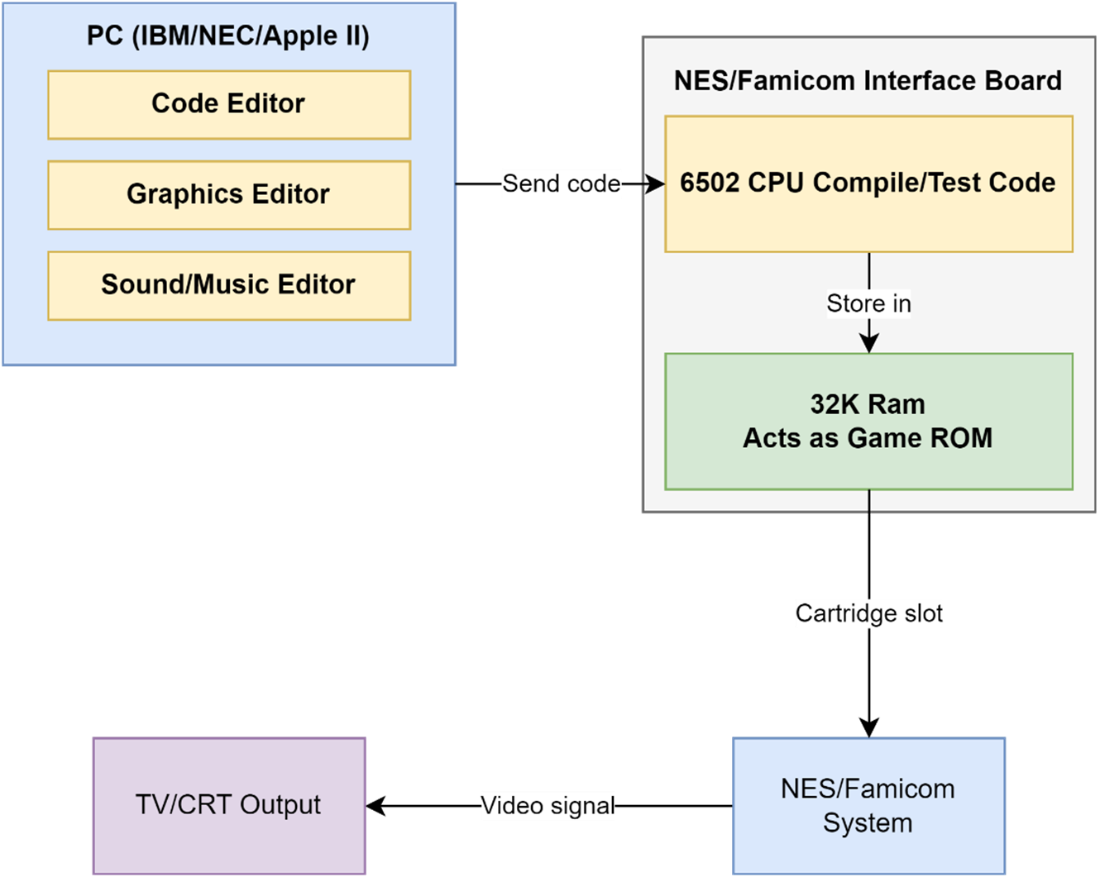
Legacy Game Development
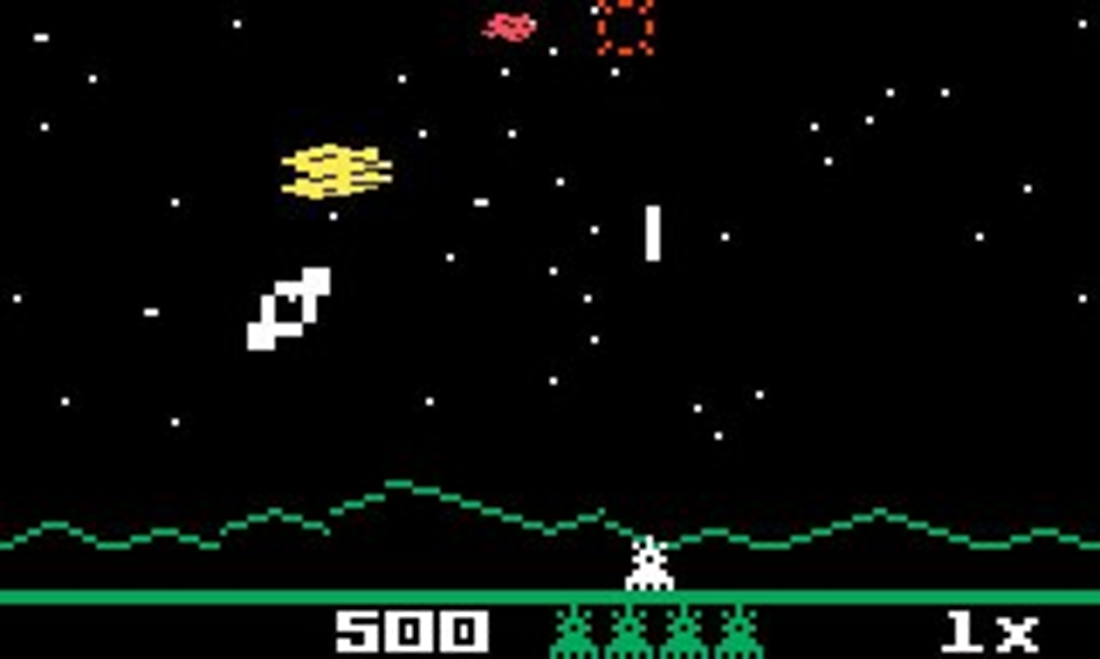
Astrosmash running on the Intellivision.
NES Architecture
The structure of a game
NES PPU Chip – what is a vBlank
Summary
By learning and using 6502 Assembler you will be able to take control and make the most of the hardware.
Developing games for a retro console can provide a way to demonstrate your skills and passion in the game industry without having to involve a team of people.
Your game code needs to wait for the NES console hardware to be ready.
The “Game Loop” is the most important part of a game.
Most games have a way to make progress with different levels, enemies, and increased difficulty.
Player satisfaction is improved if a game has a background story and a defined ending.
FAQ
What is the goal of Chapter 1 and what game will we build?The chapter sets the stage for creating a simple, playable space shoot-’em-up inspired by Astrosmash. Along the way, you’ll learn 6502 assembly, how the NES draws graphics, how to read controller input, detect collisions, manage scoring, and add sound effects and music.Why make games for the NES today?The NES’s simplicity and tight constraints let a single developer or small team build complete, polished games. You’ll learn core game-engine fundamentals hidden by modern tools, practice working within strict limits (useful for mobile and embedded platforms), and join an active retro community—plus it’s a standout portfolio piece.How were NES games developed in the 1980s compared to now?Back then, studios used expensive PC-like systems, mini-computers, or 6502-based machines (e.g., Apple II) connected to a NES/Famicom via a hardware interface; official Nintendo kits remain mostly undocumented publicly. Today, accurate emulators and modern PCs make it possible for anyone to build, test, and share NES games.What are the key hardware components of the NES?The NES centers on a Ricoh 2A03 (6502-based) CPU with 2 KB of RAM, a Picture Processing Unit (PPU) for video with 2 KB of VRAM and 8 KB of pattern data from the cartridge, and an Audio Processing Unit (APU) for sound. The system’s cartridge slot also enables hardware expansion and bank switching.How does the cartridge expand what the NES can do?Cartridges provide program/data ROM with up to 32 KB visible at once via bank switching, the 8 KB pattern table for tiles/sprites (CHR ROM or RAM), and can include extra video RAM, work RAM, or battery-backed RAM for saves. Mappers on cartridges extended the console’s lifespan by adding capabilities beyond the base hardware.What programming language will we use, and why?We’ll use 6502 assembly. While some higher-level options exist (like C), assembly gives the performance and control needed to fully leverage the NES’s limited CPU and memory and to implement features that would be harder or slower in higher-level languages.How does the NES handle graphics if it isn’t a traditional bitmap display?The NES uses 8×8 pixel tiles for backgrounds and 8×8 pixel sprites for moving objects. Their pattern data lives on the cartridge and must be loaded into PPU video memory before use; screens are constructed by arranging tiles and placing sprites on top.What is vBlank and the NMI, and when can I update VRAM?The PPU draws the screen line by line; after the final line it enters vertical blank (vBlank), signaling a Non-Maskable Interrupt (NMI) to the CPU. vBlank is the safe window to write to PPU VRAM—updating VRAM while the screen is being drawn can cause visual glitches.What does initializing the NES for a game involve?Typical steps include waiting for the hardware to be ready, clearing RAM, initializing the APU (and silencing any sound), detecting connected controllers, and uploading required tile/sprite patterns to PPU memory so graphics can be drawn correctly.What is the overall structure of a game described in this chapter?A typical flow is: initialize the console; show intro/title screens and wait for input; run the main game loop (read input, move the player, spawn and move enemies, detect collisions, animate objects, increase difficulty); let the PPU draw updates each frame during vBlank; and finally present an ending or summary screen for closure.
pro $24.99 per month
access to all Manning books, MEAPs, liveVideos, liveProjects, and audiobooks!
 Classic Game Programming on the NES ebook for free